创建 Android 设置界面 (第四部分)
原文:https://medium.com/@JakobUlbrich/building-an-android-settings-screen-part-4-9558029827b7
这部分的内容本来是作为第三部分的一个回答来发布的。它将告诉你如何 为v7 preferences support library中的PreferenceFragmentCompat 自定义布局。只需按下下面的步骤就可以了。
首先,找到你的style.xml 文件并搜索 App Theme(PreferenceFragment所属的Activity的主题)。此时它应该是长这样的:
<style name="AppTheme" parent="Theme.AppCompat">
    ...
    <item name="preferenceTheme">
        @style/PreferenceThemeOverlay.v14.Material
    </item>
    ...
</style>
找到了?
把它修改成:
<style name="AppTheme" parent="Theme.AppCompat">
    ...
    <item name="preferenceTheme">
        @style/AppPreferenceTheme
    </item>
    ...
</style>
并添加下面两个样式:
<!-- Custom Preference Theme -->
<style name="AppPreferenceTheme"
        parent="@style/PreferenceThemeOverlay.v14.Material">
    <item name="preferenceFragmentCompatStyle">
        @style/AppPreferenceFragmentCompatStyle
    </item>
</style>
<!-- Custom Style for PreferenceFragmentCompat -->
<style name="AppPreferenceFragmentCompatStyle"
        parent="@style/PreferenceFragment.Material">
    <item name="android:layout">@layout/pref_screen</item>
</style>
In our custom AppPreferenceTheme (which inherits from the v14 Material Theme) we override the style for PreferenceFragmentCompat.
在我们的AppPreferenceTheme(继承了 v14 Material Theme)中,我们重写了PreferenceFragmentCompat的style。
最终我们在AppPreferenceFragmentCompatStyle中修改了PreferenceFragmentCompat的布局文件。
在布局文件(这里是 pref_screen.xml)中,必须包含一个id为@+id/list_container (support library version 23.4.0) 或者 @android:id/list_container (support library version 24.2.0)的ViewGroup。注意谷歌把 R.id.list_container (in revision 23.4.0) 改成了 android.R.id.list_container (in revision 24.0.0)。Android Studio 会提示新id需要API 24,但是就版本仍然能用。
It should look like this:
<?xml version="1.0" encoding="utf-8"?>
<LinearLayout
    xmlns:android="http://schemas.android.com/apk/res/android"
    android:orientation="vertical"
    android:layout_width="match_parent"
    android:layout_height="match_parent">
<Button
        android:layout_width="match_parent"
        android:layout_height="wrap_content"
        android:text="Button in custom layout"/>

    <FrameLayout
        android:layout_width="match_parent"
        android:layout_height="match_parent"
        android:id="@android:id/list_container"/>
</LinearLayout>
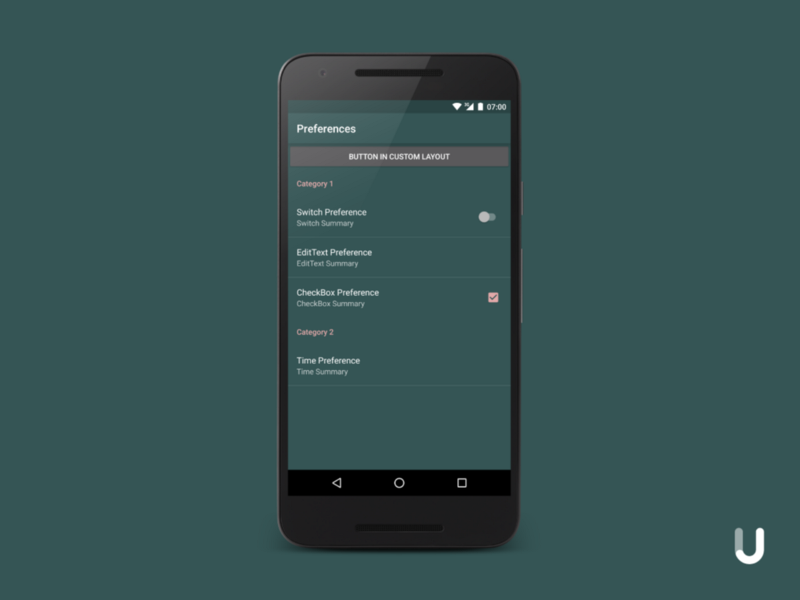
现在你的app应该是类似下面这样:

你可以在GitHub上查看项目文件。


