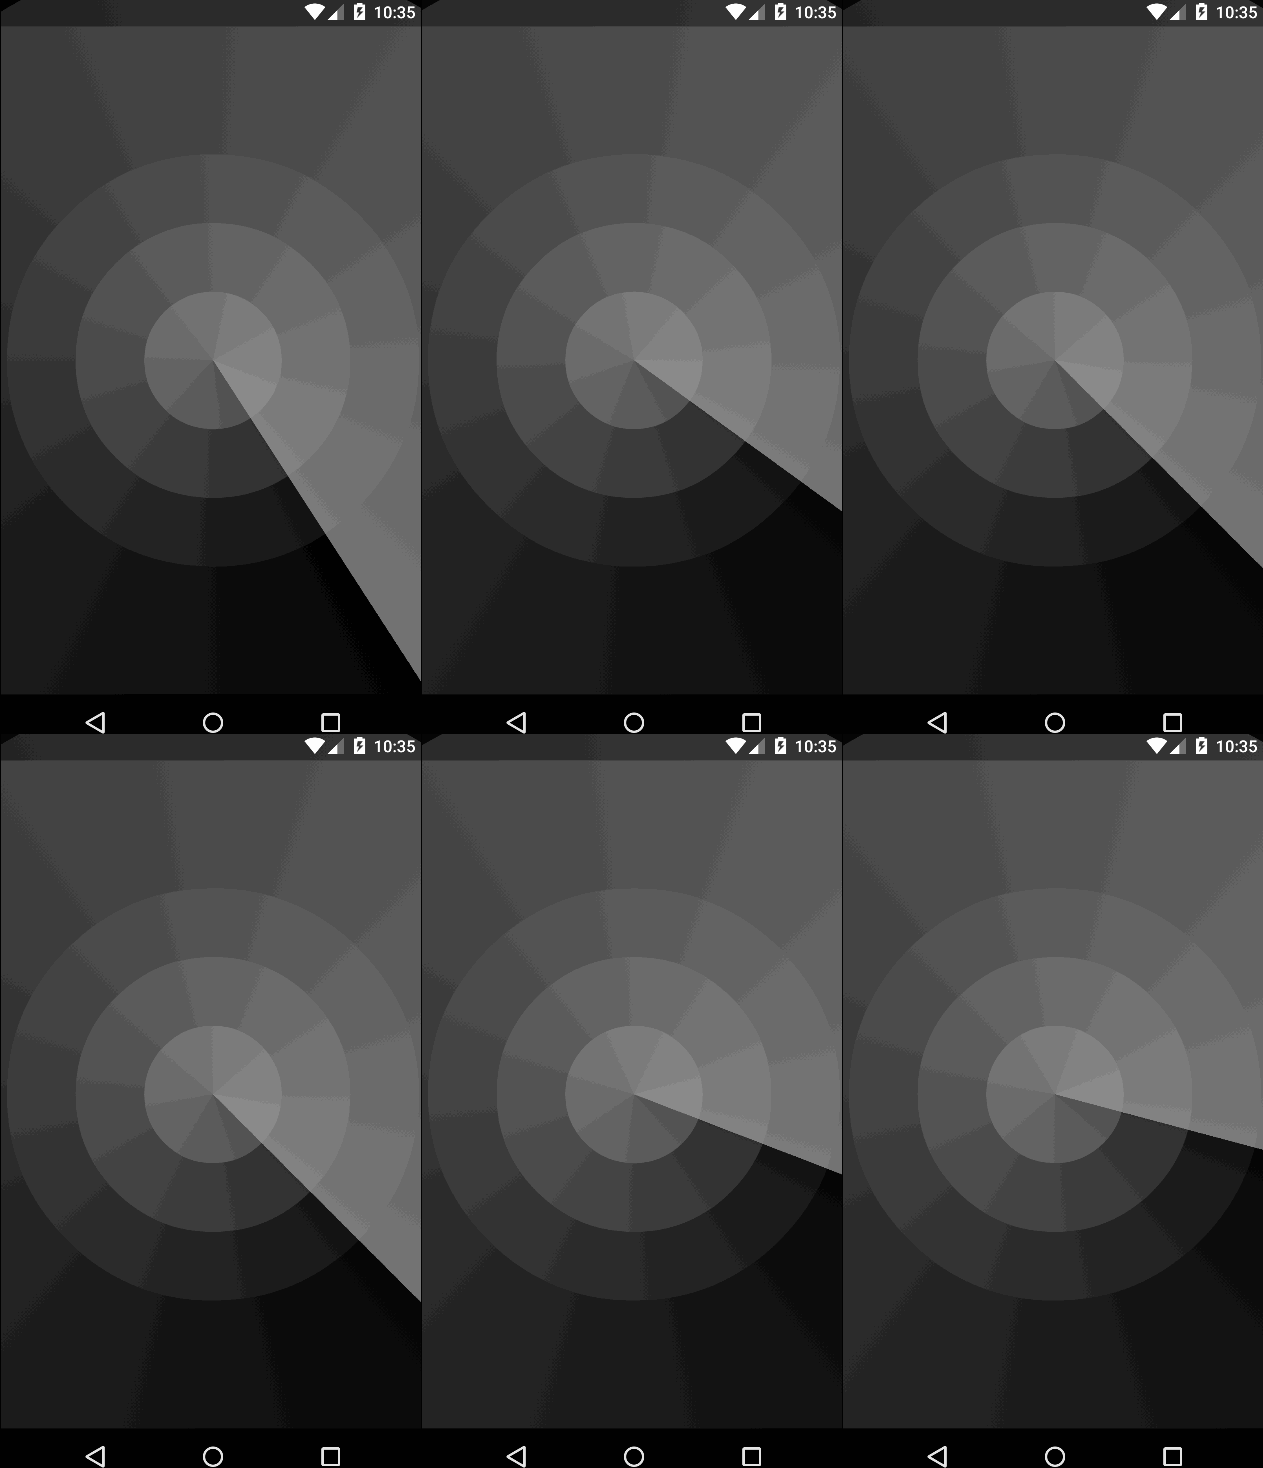
Drawable Resource 之旅(二):ShapeDrawable 详解与应用(仿微信雷达扫描)

本文如下平台同步发布
掘金专栏:https://juejin.im/post/5911163b61ff4b00625cec85
CSDN:http://blog.csdn.net/easyer2012/article/details/71440819
作者:Speedy
一、前言
在我们的日常开发中,需要大量的图片来美化我们的 APP,图片的大量使用在增强 UI 的美观性外,也带来诸多的问题,比如:导致程序出现 OOM(内存溢出)、APK 体积变的十分臃肿,内存泄露等 。事实上,在大部分情况下,我们都可以通过 ShapeDrawable 来绘制我们需要的图形,从而有效避免使用图片而带来的诸多问题 。ShapeDrawable 可以理解为通过颜色来绘制的图形,它既可以是纯色的图片,也可以具有渐变效果的图形 。ShapeDrawable和其他层次化的 Drawable 一起使用,可以绘制各非常绚丽的图形与动画效果。
二、ShapeDrawable 详解
ShapeDrawable 对应 < shape > 标签,其语法如下:
<?xml version="1.0" encoding="utf-8"?>
<shape
    xmlns:android="http://schemas.android.com/apk/res/android"
    android:shape=\["rectangle" | "oval" | "line" | "ring"\] >
    <corners
        android:radius="integer"
        android:topLeftRadius="integer"
        android:topRightRadius="integer"
        android:bottomLeftRadius="integer"
        android:bottomRightRadius="integer" />
    <gradient
        android:angle="integer"
        android:centerX="integer"
        android:centerY="integer"
        android:centerColor="integer"
        android:endColor="color"
        android:gradientRadius="integer"
        android:startColor="color"
        android:type=\["linear" | "radial" | "sweep"\]
        android:useLevel=\["true" | "false"\] />
    <padding
        android:left="integer"
        android:top="integer"
        android:right="integer"
        android:bottom="integer" />
    <size
        android:width="integer"
        android:height="integer" />
    <solid
        android:color="color" />
    <stroke
        android:width="integer"
        android:color="color"
        android:dashWidth="integer"
        android:dashGap="integer" />
</shape>
各标签、属性详解:
< shape >
android:shape 表示:图形的形状,可以定义下面四种类型的形状
-
rectangle : 矩形。默认的形状,可以画出直角矩形、圆角矩形、弧形等。
-
oval: 椭圆形。长宽一样时表示正圆。
-
line: 线形,可以画实线和虚线。
-
ring: 环形,可以画环形进度条。
当 android:shape="ring" 时,又具有如下特殊的属性:
-
android:thickness 厚度, 圆环的厚度 = 外半径 - 内半径 ,当和thicknessRatio一起存在时,以thickness为准。
-
android:innerRadius 圆内的内半径,当和innerRadiusRatio同时存在时,以innerRadius为准
-
Android:innerRadiusRatio 内半径在占整个Drawable宽度的比例,默认值是9。如果为n,那么 内半径 = 宽度 / n。
-
android:thicknessRatio 厚度占整个Drawable的宽度的比例,默认值是3。如果为n,那么 厚度 = 宽度 / n 。
-
android:useLevel 一般都应该使用false,否则可能无法达到预期的效果,除非他被用来作为 LevelListDrawable 来使用。
< corners > 表示:角度 ( 只适用于 android:shape="rectangle" ), 表示 shape 图形四个角的圆角程度,每个圆角半径值都必须大于1,否侧就没有圆角 。
-
android:radius 为四个角同时设定相同的角度,优先级低,会被下面几个覆盖。
-
android:topLeftRadius 左上角的角度
-
android:topRightRadius 右上角的角度
-
android:bottomLeftRadius 左下角的角度
-
android:bottomRightRadius 右下角的角度
< gradient > 表示:渐变效果
-
android:angle 渐变的角度,默认是0,其值必须是45的整数倍。0表示从左边到右,90表示从上到下。具体效果随着角度的调整而产生变化,角度影响渐变方向。
-
android:centerX 渐变中心的横坐标点
-
android:centerY 渐变中心的纵坐标点
-
android:centerColor 渐变色的中间色
-
android:endColor 渐变色的结束色
-
android:gradientRadius 渐变的半径(仅当 android:type 为radio时有效)
-
android:startColor 渐变色的起始色
-
android:type 渐变的类型
linear 线性渐变 (默认值)
radial 径向渐变
sweep 扫描线渐变
android:useLevel 一般为false,当Drawable作为StateListDrawable时有效。
< padding > 表示:内边距
- android:top bottom left right 分别设置上下左右的内边距。
< size > 表示:shape 大小
-
android:height 指定shape高
-
android:width 指定shape宽
**说明:**严格来说 shape 没有宽高,但是我们指定size就有了所谓的宽高。当shape作为View 的背景时,shape 还是会被拉伸的,所以这个宽高并不是指定多少就固定了shape大小(对于Drawable都是没有绝对的宽、高的)。
< solid > 表示:纯色填充 (与gradient互斥,纯色或者渐变只能取一个)
- android:color 指定shape的颜色
< stroke > 表示:描边
-
android:width 描边的宽度,越大则shape的边缘线越粗
-
android:color 描边的颜色
-
android:dashGap 虚线的空隙的间隔
-
android:dashWidth 虚线的宽度
注意: 如果 android:dashWidth 和 android:dashGap 两者有任意一个为0,那么虚线效果就无法显示。
三、ShapeDrawable 应用案例(仿微信雷达扫描)
先看看运行效果截图:

运行效果截图
**说明:**本案例使用到了 LayerDrawable ,后期会重点讲解。这里先简单介绍一下:LayerDrawable 对应 < layer-list> 标签, LayerDrawable 表示一种层次化的 Drawable 集合,通过将不同的 Drawable 放置在不同的层上边,从而达到一种叠加后的效果。
1,绘制雷达波纹 : /res/drawable/wave.xml
<?xml version="1.0" encoding="utf-8"?>
<layer-list xmlns:android="http://schemas.android.com/apk/res/android">
    <item>
        <!--最外层圆圈-->
        <shape android:shape="oval">
            <solid android:color="#10FFFFFF" />
            <size
                android:width="600dp"
                android:height="600dp" />
            <stroke
                android:color="#10B8B8B8"
                android:dashWidth="1dp" />
        </shape>
    </item>
    <item
        android:bottom="100dp"
        android:left="100dp"
        android:right="100dp"
        android:top="100dp">
        <!--中间层圆圈-->
        <shape android:shape="oval">
            <solid android:color="#1CFFFFFF" />
            <stroke
                android:color="#1CB8B8B8"
                android:dashWidth="1dp" />
        </shape>
    </item>
    <item
        android:bottom="200dp"
        android:left="200dp"
        android:right="200dp"
        android:top="200dp">
        <!--中心圆圈-->
        <shape android:shape="oval">
            <solid android:color="#2CFFFFFF" />
            <stroke
                android:color="#2CB8B8B8"
                android:dashWidth="1dp" />
        </shape>
    </item>
</layer-list>
预览效果:

雷达波纹
绘制扫描光束:/res/drawable/light_beam.xml
<?xml version="1.0" encoding="utf-8"?>
<shape
    xmlns:android="http://schemas.android.com/apk/res/android"
    android:shape="oval">
    <size
        android:width="500dp"
        android:height="500dp" />
    <gradient
        android:endColor="#AAAAAAAA"
        android:startColor="#00000000"
        android:type="sweep"
        />
</shape>
预览效果:

Activity 布局文件:/res/layout/activity_shape_drawable.xml
<?xml version="1.0" encoding="utf-8"?>
<FrameLayout xmlns:android="http://schemas.android.com/apk/res/android"
    xmlns:tools="http://schemas.android.com/tools"
    android:layout_width="match_parent"
    android:layout_height="match_parent"
    android:background="#FA000000"
    android:clipToPadding="false"
    android:fitsSystemWindows="true"
    tools:context="com.speedy.shapedrawabledemo.ShapeDrawableActivity">
    <ImageView
        android:id="@+id/ivWave"
        android:layout_width="match_parent"
        android:layout_height="match_parent"
        android:layout_margin="5dp"
        android:src="@drawable/wave" />
    <ImageView
        android:id="@+id/ivLightbeam"
        android:layout_width="match_parent"
        android:layout_height="match_parent"
        android:src="@drawable/light_beam"
        />
</FrameLayout>
Activity 代码:
/**
 *  Created by Speedy on 2017/5/09.
 */public class ShapeDrawableActivity extends AppCompatActivity {
    private ImageView ivLightbeam;
    private ObjectAnimator radarScanAnim;   // 扫描动画
    private int width;
    private int height;
    @Override
    protected void onCreate(Bundle savedInstanceState) {        super.onCreate(savedInstanceState);
        setContentView(R.layout.activity_shape_drawable);
        ivLightbeam = (ImageView) findViewById(R.id.ivLightbeam);
    }
    @Override
    protected void onResume() {        super.onResume();
        startScan();
    }
    @Override
    public void onWindowFocusChanged(boolean hasFocus) {        super.onWindowFocusChanged(hasFocus);        if(height == 0 || width == 0){            //获取屏幕长、宽
            width = ScreenUtils.getScreenWidth(this);
            height = ScreenUtils.getScreenHeight(this);            //根据屏幕长、宽计算扫描圆的直径
            int diameter= (int) Math.sqrt(Math.pow(height,2)+ Math.pow(width,2));            //修改光束的大小,使光束可以扫描到整个屏幕
            FrameLayout.LayoutParams layoutParams = new FrameLayout.LayoutParams(diameter,diameter);
            ivLightbeam.setLayoutParams(layoutParams);            //将扫描光束的中心移至屏幕内容中心
            int offsetX = (width-diameter)/2;
            int offsetY = (height-diameter)/2 + ScreenUtils.getStatusHeight(this)/2;
            ivLightbeam.setX(offsetX);
            ivLightbeam.setY(offsetY);
        }
    }
    @Override
    protected void onPause() {        super.onPause();
        stopScan();
    }    // 开始扫描
    private void startScan(){
        radarScanAnim = ObjectAnimator.ofFloat(ivLightbeam,"rotation",0f,360f);
        radarScanAnim.setDuration(2000);    //2秒扫描一圈
        radarScanAnim.setInterpolator(new LinearInterpolator());
        radarScanAnim.setRepeatCount(ObjectAnimator.INFINITE);//循环扫描
        ivLightbeam.setVisibility(View.VISIBLE);
        radarScanAnim.start();
    }   // 停止扫描
    private void stopScan(){
        ivLightbeam.setVisibility(View.GONE);
        radarScanAnim.end();
    }
}
运行效果截图:

最后运行效果:
说明:录制的GIF丢帧比较严重,所以扫描看起来不连贯了,在手机上运行效果不会是这样的。

Demo 源码下载地址:http://download.csdn.net/detail/easyer2012/9837222


